Monday, July 24, 2023

Multicast Optimization with Aruba

Multicast with Aruba controller-based wireless can be challenging and a little intimidating. There are a plethora of buttons and knobs for optimizing or outright disabling multicast on your wireless networks. Hopefully, this blog post will help readers better understand what they can do to make multicast run smoothly on their Aruba wireless networks. 

Settings That Disable Multicast 


If you want multicast traffic to work at all on your virtual APs, there are two settings that need to be disabled: 
  • On the virtual AP profile, the setting "Drop broadcast and multicast" must be disabled. This one is self-explanatory. With this setting enabled, the SSID will not forward any multicast traffic from the wire to wireless clients, or from wireless clients to other wireless clients. UPDATE: after a tip from Paul Finlay with Aruba ERT, I went back and tested this. Multicast will work with the "drop broadcast and multicast" option enabled if clients request multicast via IGMP joins. Enabling this option will block unsolicited multicast but will still allow streams requested by clients. 
  • On the VLAN associated with a virtual AP, the setting "Broadcast/Multicast Optimization" must be disabled. When enabled, only some basic multicast groups, like VRRP, will be allowed.  
If you're like me, you wonder why there are two options to drop multicast traffic. Why have the broadcast/multicast optimization setting if you can disable all multicast traffic for a virtual AP? The answer is because the VLAN setting applies to more than just virtual APs; it also applies to wired ports for things like Remote APs. If you want multicast to work for your wireless network, both must be disabled. 

Normal Multicast


Without any special configuration, multicast traffic between wireless clients will work as long as the settings mentioned above are disabled. Traffic will be delivered to all clients on the WLAN, even if they aren't listening for it. As defined in the 802.11 standard, multicast and broadcast traffic is buffered at the AP or controller and is delivered at the DTIM, which by default is every beacon interval. The AP will let clients know that multicast traffic is coming after the beacon (wlan.tim.bmapctl.multicast == 1 is a handy Wireshark display filter for find beacons that indicate multicast traffic is coming). 

The AP will then send the multicast frames at the lowest mandatory rate for the virtual AP. 

Figure 1: Normal Multicast Traffic

Note the data rate and Destination address fields in Figure 1. 

The multicast traffic is sent at the lowest mandatory rate because that is what is required by the 802.11 standard, but what if there was a way to increase the data rate to make delivery of multicast traffic faster? 

Multicast Rate Optimization 


The first method that Aruba provides to boost multicast is Multicast Rate Optimization, which allows the mcast traffic to be sent at a higher data rate than the lowest mandatory rate for the SSID. 

The way it works: Every second, the list of stations connected to the BSS is scanned and the lowest common transmit rate is found. That rate is then used for transmitting multicast traffic to the BSS. Traffic is still sent at the DTIM interval, and is still delivered over-the-air as a multicast frame. 

Multicast Rate Optimization is configured on the SSID profile linked to the virtual-ap profile. In the GUI, you'll have to scroll down a bit to find the setting. 

Figure 2: Enabling BC/MC Rate Optimization in the SSID Profile

Below is a Wireshark trace of multicast traffic with Broadcast/Multicast Rate Optimization enabled on the virtual AP. 

Figure 3: Multicast Rate Optimization Operation

Note that the data rate is now 24 Mbps instead of the 6 Mbps in Figure 1. A marked improvement in the speed for multicast traffic. 

Dynamic Multicast Optimization


Regardless of the data rate chosen for multicast traffic, there are two limitations that can't be overcome: the traffic is sent only at the DTIM (every 100ms by default), and it can't be retransmitted in case of a failure. The first limitation can cause problems with voice applications. A standard voice codec like G.711 will send 50 packets per second. Because normal multicast can only be delivered at the DTIM, this can cause gaps in the audio stream, resulting in jitter. Unless a receiver has a buffer to smooth out this delay, the resulting audio quality can suffer. The second limitation is a result of the 802.11 standard. Broadcast and multicast frames are not acknowledged by receivers. Since they are not acknowledged, there's no way to tell of a client received the frame or not, and no mechanism for retransmitting the frame if a client didn't receive it. 

If there was a way to transform multicast traffic to unicast traffic, it would solve both of these issues. Unicast traffic can be sent any time between DTIMs, and it can be acknowledged and retransmitted if necessary. 

This mechanism is implemented as part of the 802.11v amendment and is known as Directed Multicast Service, or DMS for short. DMS relies on the clients connected to a BSS to request that multicast traffic be converted to unicast for them. Like any amendment, support for DMS on the client end is spotty. Other wireless vendors also have mechanisms for unicast conversion: with Cisco, it is called multicast-direct or media stream, depending on which document you read. 

With Aruba, this mechanism is called Dynamic Multicast Optimization, or DMO for short. Multicast traffic is converted to unicast and sent directly to the clients that want the traffic. For DMO to work, IGMP proxy must be enabled on the VLAN mapped to the virtual AP (I say IGMP proxy because I work with ArubaOS 8 clusters. IGMP snooping might work for standalone controllers, but I haven't verified that.) 

Figure 4: IGMP Proxy

In order to enable IGMP proxy, the VLAN interface must be configured with a valid IP address first. When enabling IGMP proxy, you must define the proxy interface, which is the port or port-channel the controller uses to send IGMP messages to the upstream switch (more on this later). 

With IGMP proxy enabled, DMO can be enabled on the virtual-ap profile: 

Figure 5: Enabling DMO

When enabling DMO, you must also specify the DMO threshold. This value sets the number of receiving clients above which DMO will be turned off in favor of using normal multicast delivery. This number is per active multicast group. For example, if more than 30 clients joined a single group, DMO would not be used to deliver the traffic to those clients, and it would fall back to using either normal multicast or multicast using mcast rate optimization discussed above. Let's look at a Wireshark capture with DMO enabled on the virtual AP. 

Figure 6: DMO enabled Multicast

A skeptical reader may look at Figure 6 and say, "that's just unicast traffic." They would be correct, it is just unicast traffic, at MAC layer, but since this is a WPA2 network, I can't show you the higher layers. You'll just have to trust me. If you haven't figured it out by now, all of these captures were taken using Vocera badges while doing multi-user paging, which leverage multicast in the 230.230.0.0/20 range. Note that the data rate has increased again to an HT rate of 65 Mbps, and both the destination and receiver addresses are unicast. 

DMO works best with HT-capable clients. A single non-HT station counts as 2 clients towards your DMO threshold, so if your receivers are all non-HT, you are more likely to hit the DMO threshold and have multicast traffic fall back to normal transmission methods. 

In addition to DMO, there is Distributed DMO, or DDMO. DDMO applies when the forward-mode of a WPA2/3 virtual AP is set to decrypt-tunnel instead of tunnel. With decrypt-tunnel, unicast frames are sent from the controller to the AP unencrypted, and the encryption happens at the AP. Because of this, the unicast conversion has to happen at the AP. One distinction between DMO and DDMO: if an AP has more than one receiver of a multicast stream, with DDMO the controller only needs to send the frame to the AP once. The AP will then individually encrypt the frame for each receiver and send it as unicast. With regular DMO and tunnel forwarding mode, the controller must encrypt and send a copy of the frame for every client connected to that AP. In this way, DDMO is more efficient that DMO. 

An Important Note about DMO:   In order for DMO to work, the user role assigned to your clients must allow multicast traffic, including  IGMP joins. The built-in role "voice" does not allow IGMP, and it was only until I found this reference that I was able to get DMO working by adding a new session ACL to the voice role. 

Multicast and Clusters


There are some special considerations for multicast traffic when using ArubaOS 8 or above clusters. Cluster profiles (called lc-cluster profiles in the CLI) contain an option for a "multicast VLAN." I found the documentation around this option leaving something to be desired. so I dove into it. To best demonstrate what this option does, you have to look how IGMP proxy work with the upstream wired network. 

When a wireless client wants to join a multicast stream, it will send an IGMP join. With IGMP proxy enabled, controller acting as the client's UAC will intercept the join request, and proxy it to the upstream wired network. 

Figure 7: Viewing Multicast Receivers

On the client's UAC, you can use the command show ip igmp proxy-group to view the mutlicast groups the controller is aware of. Note that VLAN shown; it is the VLAN that the client is in, based on the VLAN set in the virtual AP. When you look at the controller's upstream switch, you will see the proxied IGMP join coming from the controller's VLAN 101 IP address: 

Figure 8: Upstream Switch IGMP Groups

The "Last Reporter" IP address is the controller's VLAN 101 interface IP, partially redacted for...reasons. In all my examples so far, there has been only one multicast receiver. If there were more, they would be shown in the output of show ip igmp proxy-group on a controller, but there would still only be one group entry on the upstream switch. 

Now let's look at a cluster that has the Mcast VLAN setting defined.

Figure 8: Cluster Profile with MCAST-VLAN

When a client joins a multicast stream on a cluster with an MCAST-VLAN value set in the cluster profile, the output of show ip igmp proxy-group looks different. 

Figure 9: Proxy Group with MCAST-VLAN

Note the difference in the VLAN. Rather than the VLAN the client is in, the proxy-group now shows the value configured for the MCAST-VLAN of the cluster. Looking at the upstream switch reveals something similar: 

Figure 10: Upstream Switch with Cluster MCAST-VLAN

Note that the IGMP group now shows VLAN 777, the VLAN configured in the cluster profile for the MCAST-VLAN. Please note that for this to work, IGMP Proxy must also be configured on the VLAN interface for the VLAN chosen. In this example, IGMP Proxy was enabled on the VLAN 777 controller interfaces. 

Why go through this extra work in enabling the MCAST-VLAN on the cluster? First, with the MCAST-VLAN set, you only need to configure multicast routing (e.g., PIM) on the MCAST-VLAN router interface. You won't need to configure multicast routing on all the VLAN interfaces that the clients will reside on. The cluster will take care of sending the multicast streams to the clients. In my examples, you would only need PIM enabled on VLAN 777, and not on VLAN 101, or any other VLANs where clients might be. 

Second, if you are using a named VLAN that has a list of VLAN ids on your virtual AP, if you don't use the cluster MCAST-VLAN, multiple copies of a stream could be delivered to clients. Consider a virtual AP mapped to a named VLAN that contains VLAN ids 10 and 20. Clients on that virtual AP want to receive multicast traffic, so IGMP joins are sent out on both VLAN 10 and 20. The upstream router will see those joins and a stream will be delivered to the controller on both VLANs 10 and 20. If you are not using DMO, or DMO crosses the threshold value, both VLAN 10 and VLAN 20 streams will be delivered using "normal" multicast on the virtual AP. Not only is it now very inefficient, it could cause the clients to fail in receiving the stream. The bottom line: If you have virtual APs using named VLANs with multiple VLAN ids, and clients on those virtual APs need to receive multicast, I would recommend using the MCAST-VLAN value in the cluster profile. 

An Important Note About Using the MCAST-VLAN Setting


If you specify a VLAN id for the mcast-vlan value in the cluster profile that is different than the source vlan for multicast stream, your upstream network must be able to route the mcast traffic between those VLANs. 

In the examples above, the mcast-vlan was set to 777. If the source of the multicast traffic was for example VLAN id 132, the upstream network must be capable of routing the multicast traffic in order for all the clients on the cluster to receive the stream. I highlighted cluster here because for receiving clients that have a different UAC than the multicast source (if it is a wireless client on the cluster), the stream won't get delivered to them unless the upstream wired network can mcast route between vlan 132 and VLAN 777. 

Conclusion


This has been a long and technical blog post on multicast with Aruba controller-based wireless. I hope that the reader has gained some understanding of how to  optimize multicast with Aruba, and if you have any questions or corrections, please leave a comment. 


Wednesday, January 1, 2020

Aruba: Connectivity to Mobility Master for DMZ Deployments

I recently had the opportunity to deploy a remote worker solution using Aruba Mobility Controllers and Remote APs (RAPs). One of the first steps I took in preparing to deploy the solution was to download the Aruba Validated Reference Design, or VRD, for remote AP deployments. There was a lot of good information in that VRD, but it was a little dated. The VRD was written for ArubaOS 6.x deployments, and as a result didn't have any information about Mobility Master.

One thing the VRD does make clear is that for RAP deployments, the Mobility Controllers should be located in your DMZ. My deployment was going to use a cluster of three Mobility Controllers in a DMZ, managed by a Mobility Master that wasn't in the DMZ.

One thing that distinguishes Aruba from the "other" guys controllers is that they are configured with a Controller IP, or LMS-IP. This is the one IP interface on the controller that can terminate a connection with an AP. Because my controllers had to go in the DMZ, my Controller IP had to be an DMZ address. I don't know about your DMZ, by mine has only one way in and out, and that choke point didn't allow access to the internal network (which is good security design). The connection between my Mobility Controllers and my Mobility Master would have to be over a different interface than the DMZ one.

I initially setup my controllers with an IP for a management VLAN, and set port G0/0/0 to that VLAN. This was how I setup my connection to Mobility Master. From there, I created my DMZ interface on G0/0/4 and other settings. I made sure I had my static routes setup correctly, with default route going out the DMZ and a static route to my Mobility Master.

Now to change the Controller IP from my management VLAN to the DMZ address. As soon as I did that, my Mobility Master lost connectivity with the controllers! I thought it must have been a routing issue, but that wasn't the problem. The controllers would do an automatic config rollback and re-establish connectivity with Mobility Master, but every time I changed the Controller IP, connectivity to MM would break.

To see why the connection to MM was failing, I first had to understand what that connection looked like. The connection between Mobility Controllers and Mobility Master is an IPSec tunnel. That tunnel is established when performing the controller's initial setup through the serial port. During initial setup, you are asked for the IP address of the Mobility Master, and which method to authenticate with. If you are connecting to a Virtual Mobility Master, which I was, the two methods are PSK with IP, or PSK with MAC (where PSK stands for pre-shared key). If you choose PSK with IP, the initial setup uses the IP address of the Mobility Master entered earlier with the pre-shared key to establish the tunnel. At the Mobility Master side, you also enter the IP address of the controller and the same PSK.

This is where my problem was. Since the secure connection between the MC and MM was defined using the IP of the MC, that connection broke when changing the controller IP. To support my configuration, I had to switch the configuration to use PSK with MAC.

Using PSK with MAC is a little trickier than PSK with IP, because you have to pick the correct MAC addresses. Once you do though, it doesn't matter what you set for the Controller IP.

The moral of this story: If you plan on deploying Mobility Controllers in a DMZ for RAPs and need to use an interface for management that won't be the same as your Controller IP, use PSKwithMAC as your authentication method for setting up the connection to Mobility Master.

Sunday, July 29, 2018

Cisco + Apple Partnership - Phase 2: iOS Wi-Fi Analytics

Cisco introduced "Phase 2" of its partnership with Apple starting with release 8.5 of wireless controller code. Phase 2 brings a feature called Wi-Fi Analytics. This feature allows certain iOS devices to communicate useful information to the controller during association and disassociation.

According to Cisco and Apple Wi-Fi analytics require iOS 11, and this functionality is limited to certain devices. According to this Cisco document, Wi-Fi analytics only works on iPhone 7 or higher and iPad Pro and higher.

So how does an iOS device know it is connected to a Cisco wireless network running 8.5 code? Similar to what was seen with Fastlane and Adaptive 11r, beacons and probe responses from Cisco APs include a vendor-specific Apple information element. The difference is that this IE will appear even if Fastlane and Adaptive 11r are not enabled.

One feature of Phase 2 is beacon reports. Beacon reports are defined in 802.11k, and they allow a client to report to the infrastructure how it sees the wireless environment. This is an important metric; it's easy to learn how an AP hears a client, but that is just half the picture. Knowing how clients hear the AP's signal can be a valuable troubleshooting tool, and it allows the the controller to optimize 802.11k neighbor reports for future clients.

The neighbor reports appear in the Cisco controller dashboard under client details. Below is a report from an iPad for the one AP that it heard broadcasting the SSID it was connected to.

Client Scan Report
This information is sent via an unsolicited 802.11k beacon report, Wireshark capture shown below.

802.11k Beacon Report
The Received Channel Power Indicator (RCPI) is defined as a number between 0 and 255, and is used to indicate a receive power in dBm between -120 and 0. The conversion formula is supposed to be RCPI / 2 - 120 = dBm, but that does not appear to give a feasible value in this case, as 0xbe would equal -25 dBm. There may be some proprietary characteristics in play. Another indication of this is the Operating Class value of 241, which appears invalid.

Running a 'debug 11k all' on the controller while the neighbor report is sent generates the following output.


Received a 11k Action frame with code 1 from mobile station E4:E0:A6:xx:xx:xx
payloadLen = 31, subIe ID 39 len 29
Measurement report:
===================
Token ID: 96, Mode late: 0, Mode incapable: 0, Mode refused: 0, Type: 5
Found 802.11k beacon report element ID
Regulatory class: 241, Channel number: 165, Measure duration: 46012, Condensed Phy Type: 0, Reported Frame Phy Type: 0, RCPI: 190, RSNI: 27, BSSID: 58ac.78xx.xxxx, Antenn
payloadLen before sub= 31
payloadLen after sub = 0

That's all for this blog. In the future I hope to cover some of the other features included in Phase 2.


Thursday, November 16, 2017

Cisco's Adaptive 11r

There is an excellent post on the Cisco Support forums about options for implementing 802.11r Fast Transition. In summary, there are three ways to 802.11r for a WLAN on Cisco wireless:
  • "Pure" mode, where the only Authentication Key Management (AKM) method listed in the Robust Security Network (RSN) Information Element is a FT method. Common FT methods are 802.1X FT or PSK FT. Clients that don't support 802.11r will not be able to connect to this type of WLAN. They may not even see it. 
  • "Mixed" mode, where both FT and non-FT AKM methods are included in the AKM suite. This mode allows both clients that do and don't support FT to connect. There will still be clients that get confused by the presence of a FT AKM. Notably, if you change an existing WLAN to mixed mode FT, macOS clients may not be able to connect until you delete the WLAN profile and re-connect. 
  • Adaptive 11r. In this mode, the beacon does not advertise the FT AKM at all, but will use FT when supported clients connect. 
Let's look at beacons for different types of FT networks. First, here are the relevant IEs for a non-FT network. 
RSN IE For non-FT WLAN
Beacons and probe responses for a non-FT network will contain non-FT AKM methods in the RSN IE, like PSK shown above. There will also not be a Mobility Domain IE. Now let's look at a mixed mode network.

RSN and Mobility Domain IEs
The RSN IE contains two AKM entries; regular PSK and FT using PSK. In addition to the FT AKM, beacons and probe responses will contain the Mobility Domain IE. Next, things get a little strange with Adaptive 11r.

Adaptive 11r RSN and MD IEs
With Adaptive 11r enabled on a WLAN, the RSN IE does not have any FT methods, but the Mobility Domain IE is present. Beacons will also contain the below IE, even if Aironet IE is disabled on the WLAN. 

Adaptive 11r Aironet IE
This looks similar to the Aironet IE that appears when Fast Lane is enabled. This IE is telling iOS clients that Adaptive 11r is available to use. Similarly, a compatible iOS device will tell the Cisco WLAN that it is, well, an iOS device, by adding a vendor IE into it's association request.

Apple Vendor IE
To summarize what we know so far, beacons and probe responses from an Adaptive 11r WLAN will contain a RSN IE with only non-FT elements, but will also include a Mobility Domain IE. This is paradoxically saying that the WLAN does not support FT and supports FT at the same time. So what happens when clients try to connect? First, let's see an association request from a client that doesn't support Adaptive 11r (a Motorola Android phone).

Association Request From Android Phone

This frame looks normal, and is what you would expect when a client is connecting to a non-FT WLAN. There is no Mobility Domain IE, which implies that the client saw that there was no FT AKM method in the RSN IE. The client determined that the network did not support FT, and did not include the Mobility Domain IE. The expanded RSN IE shows that the client will use PSK as the Authentication Key Management. What happens when a client that supports Adaptive 11r connects? 

Association Request from an iPad
The RSN IE shows that the AKM chosen was FT using PSK, which is not advertised in the beacons! This is the secret sauce of Adaptive 11r. You can also see the magic happen if you run "debug client" and "debug ft events enable" while an Adaptive 11r clients connects. Below is the output of debug commands while my iPad connected. Interesting lines are highlighted in red.

f4:5c:89:xx:xx:xx Recevied management frame ASSOCIATION REQUEST  on BSSID xx:xx:xx:df:a0:30 destination addr xx:xx:xx:df:a0:3f
f4:5c:89:xx:xx:xx Updating 11r vendor IE 

f4:5c:89:xx:xx:xx Marking this mobile as TGr capable.
RSNIE in Assoc. Req.: (20)

     [0000] 01 00 00 0f ac 04 01 00 00 0f ac 04 01 00 00 0f

     [0016] ac 04 0c 00

f4:5c:89:xx:xx:xx Processing RSN IE type 48, length 20 for mobile f4:5c:89:xx:xx:xx
f4:5c:89:xx:xx:xx Selected Unicast cipher CCMP128 for client device
f4:5c:89:xx:xx:xx RSN Capabilities:  12
f4:5c:89:xx:xx:xx Marking Mobile as non-11w Capable 
f4:5c:89:xx:xx:xx Validating FT AKM's on WLAN
f4:5c:89:xx:xx:xx Setting adaptive AKM 4 into RSN Data at 19

f4:5c:89:xx:xx:xx Sending assoc-resp with status 0 station:f4:5c:89:xx:xx:xx AP:xx:xx:xx:df:a0:30-01 on apVapId 1
f4:5c:89:xx:xx:xx VHT Operation IE: width 20/0 ch 165 freq0 0 freq1 0 msc0 0x3f msc1 0x3f
f4:5c:89:xx:xx:xx Including FT Mobility Domain IE (length 5) in Initial assoc Resp to mobile 
f4:5c:89:xx:xx:xx Sending R1KH-ID as 58:8d:09:cd:75:40
f4:5c:89:xx:xx:xx Sending R0KH-ID as:10.-114.-68.66
f4:5c:89:xx:xx:xx Including FT IE (length 98) in Initial Assoc Resp to mobile 

The most interesting part of the output is "Setting adaptive AKM 4 into RSN Data at 19". AKM 4 is short for FT using PSK, and "Data at 19" specifies position in the RSN IE that defines the AKM method. If you issue a "show client detail" command for an Adaptive 11r client, you will see that AKM method listed is an FT one.


(Cisco Controller) >show client detail f4:5c:89:xx:xx:xx
Client MAC Address............................... f4:5c:89:xx:xx:xx
Client Username ................................. N/A
AP MAC Address................................... xx:xx:xx:df:a0:30
AP Name.......................................... wap004-011-ap01   
AP radio slot Id................................. 1  
Client State..................................... Associated     
Client User Group................................ 
Client NAC OOB State............................. Access
Wireless LAN Id.................................. 14 
Wireless LAN Network Name (SSID)................. Fastlane
Wireless LAN Profile Name........................ Fastlane

Policy Type...................................... WPA2
Authentication Key Management.................... FT-PSK
Encryption Cipher................................ CCMP-128 (AES)

Roaming with an Adaptive 11r compatible client is the same as roaming with regular old FT. When the client sends authentication and reassociation requests to a new AP, it includes Mobility Domain and Fast BSS Transition IEs. Roam time with the iPad I tested with was less than 10 ms. (That's how long it took to go from Authentication to the first data packet sent by the iPad. Getting the iPad to roam in the first place was a challenge, given the environment I was testing with).

I like this feature from Cisco and Apple. There appears to be no risk in breaking connectivity for non-iOS devices if you enable it, and the upside for supported devices is really good. Hopefully this blog gave readers some insight into how this feature works. 

Wednesday, October 25, 2017

Writing Custom IDS Signatures for Cisco WLCs

The recent discovery of flaws of WPA/WPA2, network operators are paying more attention the the security monitoring capabilities of their wireless infrastructure. Although the severity of KRACK is debatable, paying attention to threats to your wireless network is still a wise practice.

Cisco wireless controllers provide two methods of security monitoring with no licensing requirements other than AP adoption licenses: rogue AP scanning and IDS signature monitoring. The risk of rogue APs are well known. This blog will focus on IDS signature monitoring.

IDS signature monitoring works by listening for common attacks against wireless networks including deauthentication and EAPOL floods. It does this by looking for specific patterns in individual 802.11 frames and analyzing the frequency with which those packets are heard. If enough matching frames are received within a defined window of time, an alert is triggered and (optionally) a trap is sent to a NMS. Cisco WLCs come with a set of pre-defined signatures.

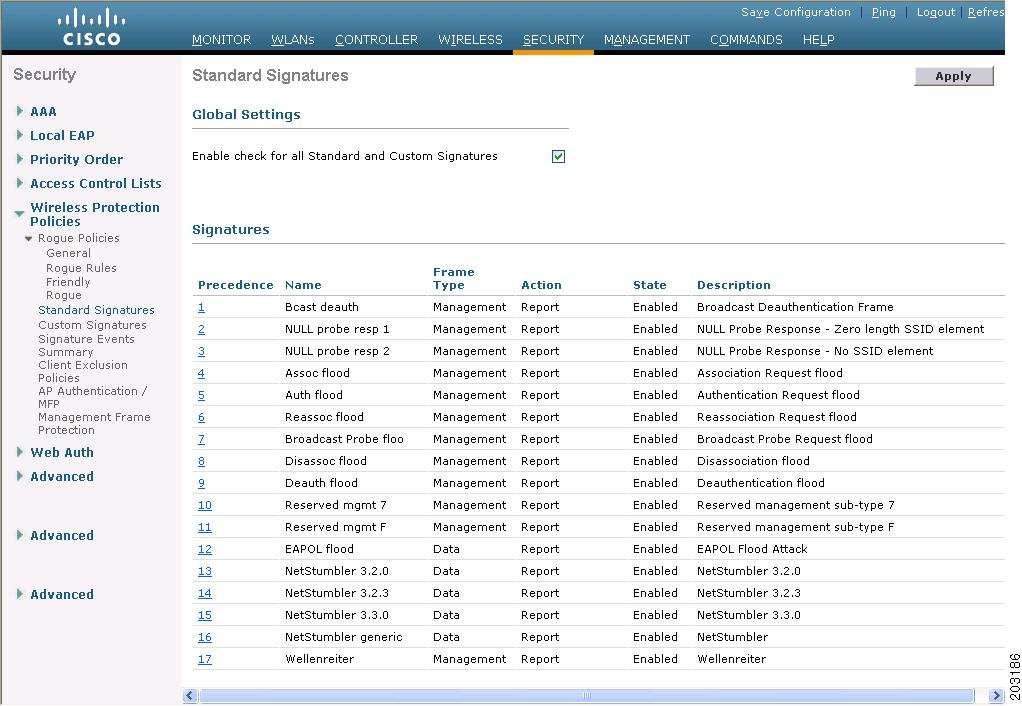
Standard IDS Signatures
Clicking on the signature precedence number will load a page that allows you to edit some parameters of the signature (more details later), but you will not be able to edit the patterns that the IDS signature will look for in frames. It will list them, but you can't edit them. If you want to make your own signatures, you will need to upload a signature file with the signature definitions in them in plain text.

To get an idea of how to create your own signatures, you can upload the standard signature file from a controller to a TFTP server. The signature file is in plain text, and extraordinarily well notated. Go to Commands -> Upload file. Select Signature File from the from the File Type drop-down, and enter your details for how to transfer the file.

Uploading the Standard Signatures
The standard signature file is very well documented, and describes the syntax required to make a signature. Rather than duplicating the information in the standard signature file, I will focus on the most important aspect of a signature: patterns. A pattern specifies a section of the 802.11 frame to extract and inspect. The section extracted can be one or more bytes, and it is selected by specifying an offset value in bytes (starting at zero), and where to start the offset from; the header or the frame body. The extracted bytes are compared to a user supplied bitmask with a binary AND operation. The result of the AND is compared to a user-defined value, and if they are equal, the pattern is a match. Signatures can contain one or more patterns, and each pattern must evaluate to true (be a match) for the whole signature to match a frame. The format of each pattern is

start:offset:value:mask

The start parameter is a bit the defines where you start the offset from; 0 for the frame header and 1 for the frame body.

You might be asking "Why the AND operation?" Why not just specify exactly what to match? The answer to that question is: sometimes it's not important that a whole byte matches, but that a specific bit matches. The bitmask with AND operation allows the user to specify exactly which bits are important. If a bit in the mask is set to 0, whether or not that bit matches is not important. If the bit in the mask is set to 1, it is required for the pattern to result in a match.

Here's an example. Suppose you wanted to write a signature that matched all frames transmitted by a locally administered MAC address. The IEEE defines locally administered (non-unique) MAC addresses as having the 2nd least-significant bit in the first octet as having a value of 1. To determine if a transmitting address is locally administered, we only need to look at the 2nd LSB in the first octet of the address. A pattern to match this would be 0:10:0x02:0x02. This pattern reads "Start at the frame header and go to the 10th byte (starting from 0), extract 1 byte from that position (implied by the length of the mask), AND it with 0x02, and if the result is 0x02, there is a match." Since locally administered MAC addresses will have the 2nd LSB equal to 1, a mask of 0x02 is all that needed. None of the other bits matter in making the determination.

Before we go any further, I should point out that it's very helpful to have a packet analyzer like Wireshark or Omnipeek handy while writing IDS signatures. If you have pcaps of the kinds of frames that you want to catch with an IDS filter, it makes it much easier to write the patterns.

There was was something that confused me though, and it was how patterns that inspected the frame control field were written. Below is a screen grab of an authentication frame from Wireshark.

Authentication Frame
Wireshark shows the Frame Control field as 0xB000; the first byte is the type/subtype, and the second byte represents the flags. When you look at the standard signature file for the "Auth Flood" signature however, the pattern looks like this:


It appears that the order of the flags and type/subtype bytes are reversed in the pattern, at least as compared to Wireshark. Other fields like addresses do not appear to have the same reversal. I'm going to take it on faith that Cisco wrote the signatures correctly, and use the same format when writing signatures that have to match a pattern in the frame control field.

Each signature requires at least one pattern and other parameters. You can read about them in the standard signature file, but I will outline them here too.

  • Version: The version of signature syntax. There is only one allowed value: 0. 
  • FrmType: The type of frame you want to inspect. The two options are data and mgmt (for management frames).
  • Interval: The amount of time in seconds that frames are collected and attempted to match to the signature. 
  • Freq: The number of frames that must match the signature within the interval before an action is taken. This essentially defines a rate for matching packets.
  • Action: What to do when a signature matches frequency frames in interval time. There are only two options: none (do nothing) and report. 
  • Quiet: The amount of time that must pass since the last frame that matched the signature in order for the alert to be cleared. 
  • Track: Defines how to track the alarm event when the signature is matched. Option are tracking by signature, tracking by offending MAC, or both. 
  • MacFreq: Optional parameter that sets the frequency of matched frames required to trigger the alert action if tracking the signature by MAC address.
Now let's take a look at writing some useful signatures. Shortly after the announcement of the KRACK vulnerabilities, a sample script for the 802.11r FT attack was published. The attack script came with a sample pcap, which showed the malicious FT reassociation request frames.

Malicious FT Reassociation Request
Curiously, the FT attack script sets the "More data buffered at AP" bit int he flags section. This isn't normal; the transmitting station is usually a client. If the attack script is not modified from its original form, a pattern to detect this frame would be 0:0:0x2020:0x20FF. The 0x00FF part of the mask will ensure that only reassociation requests are matched, and the 0x2000 part of the mask will match any frame with the "more data" flag set. Together, the 0x20FF mask will only match reassociation request frames with the "more data" flag set. The signature can be made very sensitive by setting the Freq or MacFreq values to 1, so a single frame will trigger the alert.

Another recent vulnerability is CVE-2017-11120, which can crash devices using certain chipsets by sending them 802.11k Neighbor Report Response messages with out-of-bounds operating class and channel values. The published exploit for this flaw sends a series of 11k Neighbor reports with operating class and channel values starting from 225 (0xE1) and ending at 240 (0xF0). These high values for channel number would never normally be seen in a Neighbor Report response frame. For the United States regulatory domain, you would likely never see anything over 165, but 0xE0 is the maximum allowed value. Let's take a look at a Neighbor Report Response frame.

802.11k Neighbor Report Response
I highlighted portions in the frame that correspond to sections an IDS signature will need to match. We will need at least three pattern definitions to match the three segments of the frame to uniquely identify it.

  • The frame control field of 0x00D0 (not shown above). 
  • The category and action code fields, 0x0505, in red above. 
  • The channel field in the neighbor report, in blue above. 
The pattern to match the frame control field can be cloned from the standard signatures. It will be 0:0:0x00D0:0x00FF. To match the category and action codes, a pattern of 1:0:0x0505:0xFFFF will work nicely. Since the action and category codes are seen immediately at the start of the frame body, I used a start of '1' and offset of 0. 

For the channel byte, I want to match anything greater than 0xE0. In binary, 0xE0 is 1110 0000, so anything greater than 0xE0 binary ANDed with 0xE0 will be 0xE0. A pattern of 1:16:E0x:0xE0 will match any channel value greater than or equal to 0xE0. How can I not match if the channel is equal to 0xE0? The pattern syntax allows a NOT operator, !. If I use a pattern of 1:!16:0xE0:0xFF, this will match as long as the channel value is NOT 0xE0. Combining all four patterns in a single signature will guarantee it only matches Neighbor Report responses that have channel values that are out of bounds. 

After you have defined your signatures, you will need to download them to your controller. I recommend just editing the standard signature file by deleting all of the pre-defined signatures, adding in your own signatures, and changing the line that has the keyword "Revision" to read "Revision = custom". If you don't put "custom" in, when you upload the signature file it will replace the standard signatures with your custom ones. After you download them, the new custom signatures will appear in the Custom Signatures section. Below is an example of my FT Reassociation attack signature after it was uploaded to the controller. 

Custom Signature Details
If you want traps to be sent for signature matches, make sure that it is enabled under Management -> SNMP -> Trap Controls. 

Trap Controls
Along with the technical details on custom signatures, here are some observations I have made while working on this blog: 
  • Signatures will match packets transmitted by other APs on the same controller. There is no logic to exclude frames transmitted from other authorized APs. 
  • Matching frames with variable length information elements, or IE that can appear in arbitrary order, is very difficult. 
  • If you are not using monitor mode APs, your detection is best done while the AP is on-channel. This could lead to you missing attacks happening on channels not served by your APs. You can make the filters more effective by setting the Freq or MacFreq parameters in custom signatures down to 1, so a single frame will trigger the alert. 
Finally, here is a link to a custom signature file containing the signatures that I discussed in this blog. If you wish, you can upload them to your lab controllers and try it out. 


Friday, September 29, 2017

Using SQL Queries to Analyze AP Neighbor Information

There's been debate on the state of 2.4GHz Wi-Fi. Some say 2.4 GHz is deceased, that it has kicked the bucket, shuffled off its mortal coil, joined the choir invisible. Others say it's not quite dead yet. I'm in the latter group, primarily because I have devices and applications that rely on it.

One thing most Wi-Fi engineers will agree on: if you have a high-density 5 GHz network of dual-radio APs, you will need to turn off some of the 2.4 GHz radios. There are only 3 non-overlapping channels available, and since 2.4 GHz propagates better than 5 GHz, leaving all radios enabled will result in large amounts of co-channel interference. And that's bad.

*Heavy Sigh*
So how do you decide which radios to turn off?

If you have a Cisco wireless network with lightweight APs, you can leverage RRM to help. RRM uses Neighbor Discovery Packets (NDP) to measure the RF "distance" between radios. The end result is two sets of tables: the receive neighbor table and the transmit neighbor table. The receive neighbor table contains a list, for each radio, of what other radios it can hear NDP packets from. The list contains which channel the neighbor was heard on, and the signal strength it was heard at last. The transmit  neighbor table contains a list, again for each radio, on how well other radios can hear it. The transmit neighbor table also contains channel and power information for each neighbor.

With this information, you could set a criteria for disabling a 2.4 GHz radio. If a radio has more than X receive neighbors on the same channel as it does, with a power greater than Y, that radio should be disabled. Another criteria could be if a radio has more than A transmit neighbors on the same channel as it does with power greater than B, that radio should be disabled.

Getting the information to determine this is not easy through the CLI or web interfaces. You could do it, but it would be very time and tedious. Thankfully, there is WLCCA. WLCCA is a GUI tool that can read the output of the "show run-config" command and parse it for very valuable information. One of the things it can do is export the receive neighbor table in CSV format. Once it is in CSV format, it can be imported into a database and T-SQL can be used to get the information we want.

For WLCCA to work, you need to give it the output of "show run-config." One way of getting the output is logging the output of a CLI session to text file and issuing the command. Another way is to establish a CLI session and use the transfer upload commands to send the output to a TFTP server. This is the preferred method, especially if you have a controller with hundreds of APs. You may need to extend the timeouts on your TFTP server past the defaults for the transfer to complete successfully.

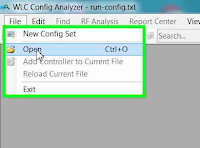
After you have the exported run-config, open WLCCA and import the file.


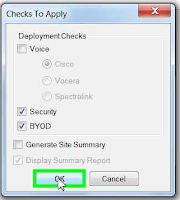
You'll be prompted with the dialog below to chose certain analysis options. You can uncheck most of the options. After clicking OK, you'll be prompted to select the file.


After importing the file, WLCCA can export the neighbor table. You perform this by going to Report Center menu.


A file dialog will open to allow you to chose the location and name of the exported file. The name you enter will be appended with "-Nearby" and given a .csv extension. Repeat these steps and export the AP Configuration List (CSV). This file will have "-APsConfig" appended to the file name you enter.

The next step is to import the CSV files into a database. For this blog, I chose Microsoft Access. Before importing in Access, the CSV files need to be cleaned up a bit to make the process smoother.

Open the CSV file for the neighbor list with Excel or a text editor. You will need to delete the first and third lines of the text file, and change the column headings so they don't contain spaces. Below is an example of the Nearby file with the edits made.


You'll also need to edit the APsConfig file in a similar way. This file has many columns, but for our purposes only four are necessary: the ID, AP name, 2.4 GHz channel, and 5 GHz channel. I used Excel for this. My polished data looked like this.


Now that the raw data is in an acceptable format, it can be imported in Access. Launch Access and create a new blank desktop database. Click on the External Data tab, then Text File to launch the wizard. First select the Nearby CSV file. Choose "Import the source data into a new table in the current database," and click OK. Next you'll be asked how to parse the file. Select "delimited" as shown and click Next.


Next, select the delimiter as a comma, and check the box to indicate that the first row contains field names.


Click Next, then Next again. Select the option to let Access add a primary key field, then click Next.


Give the new table a name. I use RxNbrs, which I will reference later in queries. Click Finish.

Repeat these steps to import the APsConfig file. There is one different step in the import process for the APsConfig file; you can chose the ID field as the primary key instead of asking Access to add one for you. When you finish, name the table APsConfig.


I promise, we're getting to the good stuff now. The first SQL query I will write will create the transmit neighbor table from the receive neighbor table. Click on the Create tab, then Query Design.

Don't add any tables, just click Close on the Show Table dialog. Switch to SQL view by selecting it in the upper left corner. Here's the query that will get the transmit neighbor table from the receive neighbor table:


SELECT RxNbr as [TxAP], AP AS [TxNbr], Power, Slot, Channel
FROM RxNbrs
ORDER BY RxNbr;

The tx neighbor table is really just the inverse of the rx neighbor table! Click on the Save icon and name the query TxNbrs.

Now the real fun begins. Let's combine the information in the APsConfig table and the RxNbrs table to see what radios have Rx neighbors on the same channel they are configured for. Go to the Create tab again, and click Query Design. Click close on the Show Table dialog, and enter SQL view. Here is the query.

SELECT APsConfig.Name, COUNT(RxNbrs.RxNbr)
FROM APsConfig LEFT JOIN RxNbrs ON (APsConfig.[2dot4channel] = RxNbrs.Channel) AND (APsConfig.Name = RxNbrs.AP)
WHERE RxNbrs.Power > -61
GROUP BY APsConfig.Name
HAVING COUNT(RxNbrs.RxNbr) > 2
ORDER BY APsConfig.Name;

This query will produce a list of 2.4 GHz radios that have 3 or more neighbors on the same channel that it hears at a power greater than -61 dBm. You can tune the power level and count to your liking. I chose -61 because that is the level at which, even if the neighbor was transmitting at minimum power, the radio would hear it at about -82 dBm. (Remember, NDP packets are sent at the maximum power supported by the radio.)  My environment has several radios that meet this criteria.


Save this query as RxCandidates. Next, let do the same analysis for the tx neighbors. Here is the query:


SELECT APsConfig.Name, Count(TxNbrs.TxNbr) AS [CountOfTxNbr]
FROM APsConfig LEFT JOIN TxNbrs ON TxNbrs.Channel = APsConfig.[2dot4channel] AND TxNbrs.TxNbr = APsConfig.Name
WHERE TxNbrs.slot=0 AND TxNbrs.power >-61
GROUP BY APsConfig.Name
HAVING Count(TxNbrs.TxNbr) > 2
ORDER BY COUNT(TxNbrs.TxNbr) DESC;

This query is getting the list of radios that have more than 2 tx neighbors that see the radio with a power greater than -61 dBm. Again, my environment has plenty of those.


Save this query as TxCandidates. Now we have a pretty good picture of  which radios can see other radios at high RSSI, and what radios can be heard by others at high RSSI. We can select radios that meet both criteria by executing the following query:


SELECT Name 
FROM RxCandidates 
WHERE Name IN (SELECT Name FROM TxCandidates);

Out of 480 APs in my sample deployment, 56 matched both my Rx and Tx criteria. This tells me that these 2.4 GHz radios occupy spaces that are already well covered by other radios, and can probably be disabled without affecting coverage. There are always caveats; make sure that the 2.4 GHz radio isn't necessary for RTLS or other services.

I know that the WLCCA tool is awesome, and has built-in reporting to help you find redundant radios. I just like working with data in SQ. If you are interested, try this in your own environment. If you get stuck, reach out to me on Twitter and I'll see if I can help.

Saturday, August 26, 2017

FRA and Macro/Micro Cell Operation - Part 2

Part 1 of this blog series looked at how Cisco 2800/3800 APs running in dual-5 GHz mode can steer clients from the macro cell to the micro cell using 802.11v BSS Transition Management frames. In this installment, I will look at what methods can be used if your clients don't support 802.11v.

Before going into the details of the other method (probe suppression), here is what I have observed while testing a mix of clients:
  • Both Android and iOS devices responded well to 802.11v Transition Management Requests. Sometimes the iOS device I was testing with would reject the request with a reason code 6, but most of the time it accepted the transition. 
  • If there are enough clients connected to the macro cell to warrant a transition to the micro cell, a client that does support 802.11v will be moved, even if it was in the macro cell "first." 
  • According to the latest RRM White Paper, if a client does not support 802.11v, but does support 802.11k, it can be transitioned, but not as gracefully. The client must request a neighbor report, and the returned neighbor list will be limited to the BSSID of the micro cell. The client will then be disassociated, after which it will hopefully connect to the micro cell. I was not able to replicate this; it was hard to find a client that supported 11k but not 11v. Turning off 802.11v on the WLAN resulted in no clients being transitioned at all, whether or not they supported 11k. 
Configuring probe suppression is shown below. Probe suppression can be configured to suppress only probe responses, or both probe responses and auth responses. 


(Cisco Controller) >config advanced client-steering probe-suppression enable probe-and-auth

(Cisco Controller) >show advanced client-steering

Client Steering Configuration Information

  Macro to micro transition threshold............ -55 dBm
  micro to Macro transition threshold............ -65 dBm
  micro-Macro transition minimum client count.... 1
  micro-Macro transition client balancing win.... 1
  Probe suppression mode......................... probe-and-auth
  Probe suppression validity window.............. 100 s
  Probe suppression aggregate window............. 200 ms
  Probe suppression transition aggressiveness.... 3
  Probe suppression hysteresis................... -6 dBm


The macro to micro transition threshold has a similar meaning with probe suppression as it did with 11v transition. If a new client is a transition candidate, probes received on the macro radio with an RSSI stronger than the macro to micro threshold will have their responses suppressed.

Probe suppression steering introduces four new parameters, only two of which are user configurable. The parameters perform the same function as those under Wireless -> Advanced -> Band Select, but have slightly different names.

The probe suppression aggregate window is an amount of time that a burst of probes from a client on a single change are considered a single probe. This is similar to the Scan Cycle Period Threshold value in Band Select. Sometimes clients will sends out probes in bursts of multiple probes. Below is a Motorola G4 probing out on 5 GHz. It sends bursts of 5 probes on the same channel, just milliseconds apart. The client-steering engine will treat these 5 probes as a single probe because they all happened within 200ms.

Probe Bursts

The probe suppression validity window is the amount of time that could elapse between probes (or bursts of probes) from a single client received on the macro radio. The default value is 100 seconds, and it acts as an age-out timer.

The validity window works with the transition aggressiveness value, which corresponds to the probe cycle count value under Band Select. The transition aggressiveness value sets a limit on the number of times probe responses from the macro radio will be suppressed. The default is 3. If a probing client was a candidate to have probe responses from the macro cell suppressed, and the client had probed out on the macro channel 3 times within 100 seconds, the fourth probe (or burst) on the macro radio would be answered. This allows clients to connect to the macro cell if they refuse to connect to the micro cell because the RSSI at the client is too low.

The probe suppression hysteresis is a user configurable value between -3 and -6 dBm, with the default being -6. When Cisco uses the word hysteresis, it refers to a dampening method to prevent clients from bouncing back and forth between radios. In the context of Client Roaming, under Wireless -> 802.11a/b, the hysteresis value tells CCX clients to move to a new AP only if the RSSI value is 3 dB better than the current AP. I stumbled across the meaning of the hysteresis in probe suppression by trying to adjust the values of the transition RSSI thresholds.

(Cisco Controller) >config advanced client-steering transition-threshold macro-to-micro -60

Value must be greater than micro to Macro RSSI - probe suppression hysteresis

(Cisco Controller) >config advanced client-steering transition-threshold micro-to-macro -60

Value must be less than Macro to micro RSSI + probe suppression hysteresis

In this case, it looks like the -6 dBm hysteresis means that probes for clients already associated to the AP would have to be 6 dB weaker/stronger to get moved to the other cell. This makes sense, as you don't wont the client bouncing back and forth between the micro and macro cells because of small differences in RSSI that could just be from different client device orientations.

My testing with probe suppression for client steering was mostly subjective. Since the clients did not associate, I could not use "show client detail" to see the RSSI of the probe requests at the AP. I could definitely see probe suppression in action over the air. Below is a capture on channels 44 and 161. The macro cell was on channel 161, and you can see probes on 161 being ignored.

Probe Suppression of Macro Cell
The client connects to the micro cell on channel 44.

Other testing I conducted involved the transition aggressiveness factor. My Moto G4 cycles through the 5 GHz channels in about 6 seconds. With a transition aggressiveness factor of three, it should take about 24 seconds to see probe responses from the macro cell. My observations lined up with this prediction within a few seconds.

Overall, I didn't find the probe suppression method of client steering to be as predictable as the 11v method, but it did work satisfactorily. Given that most clients now support 11v I would prefer using that method over probe suppression.